Many crystal types can be oriented with the MWL120 real-time system. Below, you will find a small selection of examples demonstrating the MWL120 system's orientation workflow.
Examples:
Orienting Gallium Arsenide Single Crystals with the MWL120 System
Step 1 — Prepare the Sample
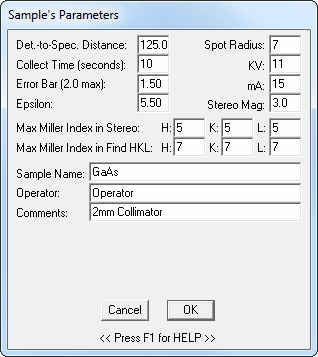
Mount a cut (but not polished) GaAs crystal at a 125mm film-to-specimen distance and enter a Collect Time of 10 seconds into the 'Sample Parameters' dialogue window (Parameters->Sample Parameters).
For 11-13 kV operation of a Tungsten X-ray tube, only Miller indices up through 7 are needed.
Step 2 — Collect a Laue Image
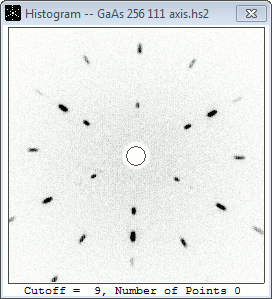
Click the Collect Image icon —
![]() — or press Ctrl+H to begin image aqcuisition. The collected Laue image will appear after
10 seconds.
— or press Ctrl+H to begin image aqcuisition. The collected Laue image will appear after
10 seconds.
Step 3 — Generate an hkℓ Solution
Load the indexing file "cubic3_36planes.idx" (File->Select Indexing File or Ctrl+I). An indexing file contains a table of Miller indices which NorthStar uses to compare an image's Laue pattern against when generating an hkℓ solution.
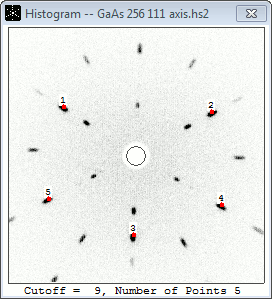
Click the Autodetect Points icon —
![]() — or Points->Auto Detect Points to let NorthStar select Laue spots for you.
Alternatively, you can click the Add Points icon —
— or Points->Auto Detect Points to let NorthStar select Laue spots for you.
Alternatively, you can click the Add Points icon —
![]() — or Points->Add Points to manually select Laue spots. 5 or 6 points should be sufficient.
— or Points->Add Points to manually select Laue spots. 5 or 6 points should be sufficient.
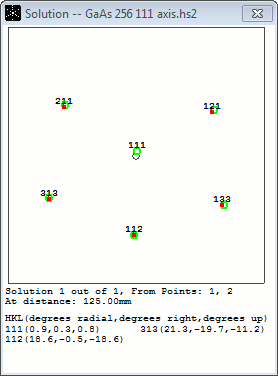
Click the Find hkℓ icon —
![]() — or Analyze->Find HKL to generate an hkℓ solution.
— or Analyze->Find HKL to generate an hkℓ solution.
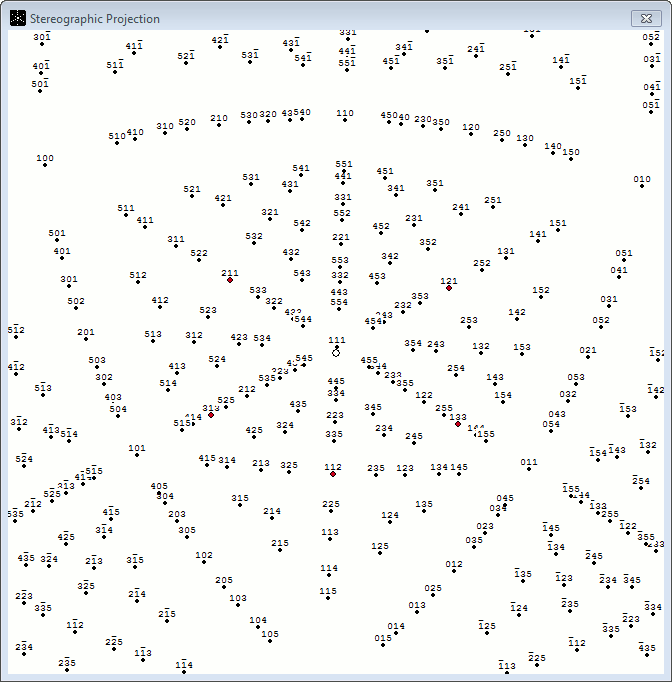
This image shows the 111 plane is (radially) 0.9° out of alignment — +0.3° horizontally and +0.8° vertically.
Step 4 — Generate a Stereographic Projection
The orientation of the GaAs sample is now fully described relative to the X-ray beam. This solution can be used to compute a stereographic projection of the orientation (i.e. the Miller indices can be mapped onto a plane). The stereographic projection can be rotated to locate additional planes of symmetry and determine the exact angles of rotation necessary to position the crystal sample in that orientation.
Click the Stereographic Projection icon —
![]() — or Analyze->Stereo Projection.
— or Analyze->Stereo Projection.
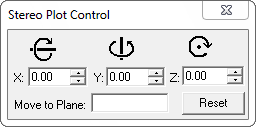
Notice the Stereo Plot Control tools. The values for X, Y, and Z are set to 0 because the sample does not need to be physically rotated to match the projected orientation (111).

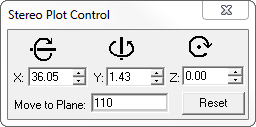
Clicking the 110 dot on the stereographic projection will center the 110 plane, and the Stereo Plot Control will then reflect the angular values necessary to physically rotate the crystal sample into the 110 orientation. In this case, the GaAs sample would need to be rotated +36.05° about the X axis and +1.43° about the Y axis. This can be done either by offsetting the 3-axis stage by these values, or by eye in real-time mode.
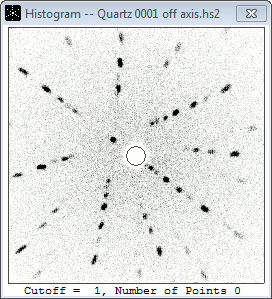
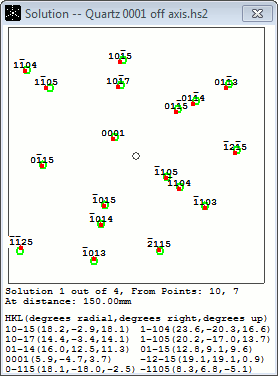
Quartz Laue Pattern and Miller Indexing
|
|
Collect an Image
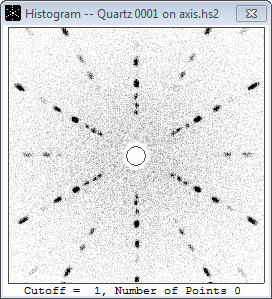
A quartz sample was mounted 150mm from the detector and an image was collected at a 5 second exposure time |
|---|
|
|
Generate an hkℓ Solution
The indexing file "QU_C1.idx" was loaded and the 'Display 4 Miller Indices' and 'Find Extra Planes' features were enabled |
|---|
|
|
Orient the Quartz Sample
The quartz sample was centered on the 0001 plane using the MWL705 3-axis rotation goniometer |
|---|
 2025 Multiwire Laboratories, Ltd., 95 Brown Rd MS-1018, 266A Langmuir Bldg., Ithaca NY 14850, USA